

Why Most People Miss What's Right in Front of Them
Bank statements are one of the most information-dense documents a consumer receives regularly — and one of the least carefully read. The typical response is a quick glance at the closing balance followed by a mental sign-off. That approach leaves real money on the table.
Errors, duplicate charges, unauthorized transactions, and quietly accumulating fees tend to cluster in the parts of a statement most people skip: the fee summary, the fine-print service charges, and the middle rows of a long transaction list. Developing a structured review habit changes that. It also builds the kind of financial self-awareness that supports stronger saving and debt management over time.
Think of your statement less as a receipt and more as a financial log — one that, read carefully, tells you exactly where your money went and whether your bank held up its end of the arrangement.
Build a Monthly Statement Review Habit
Set a recurring 15-minute calendar reminder on the same day each month — the day after your statement closes works well. Treat it like a financial check-in rather than a chore. Consistent review makes it far easier to spot anomalies because you'll recognize what a normal statement looks like for your account.
What's in a Bank Statement and What Each Part Means
Before working through the steps, it helps to understand the standard structure of a bank statement. Most follow a consistent layout regardless of institution:
- Account information block: Your name, account number (usually partially masked), and the statement period dates.
- Account summary: Opening balance, closing balance, total credits, and total debits for the period.
- Transaction register: A chronological list of every posted transaction — deposits, withdrawals, transfers, purchases, and fees.
- Fee disclosure: An itemized breakdown of any charges the bank applied during the period.
- Interest summary (if applicable): Interest earned on savings or interest charged on an overdraft line.
Some banks also include notices about rate changes, policy updates, or account terms — worth reading even if the dense formatting discourages it. These notices can affect your account costs going forward.
Report Errors Within Required Timeframes
Under the Electronic Fund Transfer Act, consumers generally have 60 days from the statement date to dispute unauthorized electronic transactions. Waiting longer can significantly limit your ability to recover funds. Contact your bank immediately if you spot a charge you don't recognize, and follow up in writing.
What you will need
Bank Statement (Paper or PDF)
The primary document you'll be reviewing — downloadable from your bank's online portal or received by mail.
Spreadsheet or Budgeting App
Useful for categorizing transactions and comparing spending month over month.
Receipts or Purchase Records
Helps verify individual transactions against what you actually spent.
Locate and Open Your Statement
Log into your bank's online portal or mobile app and navigate to the statements section. Most banks retain 12–24 months of statements as downloadable PDFs. If you receive paper statements, locate the most recent one. Check the statement period — typically printed near the top — which tells you the exact date range the document covers.
Review the Account Summary Section
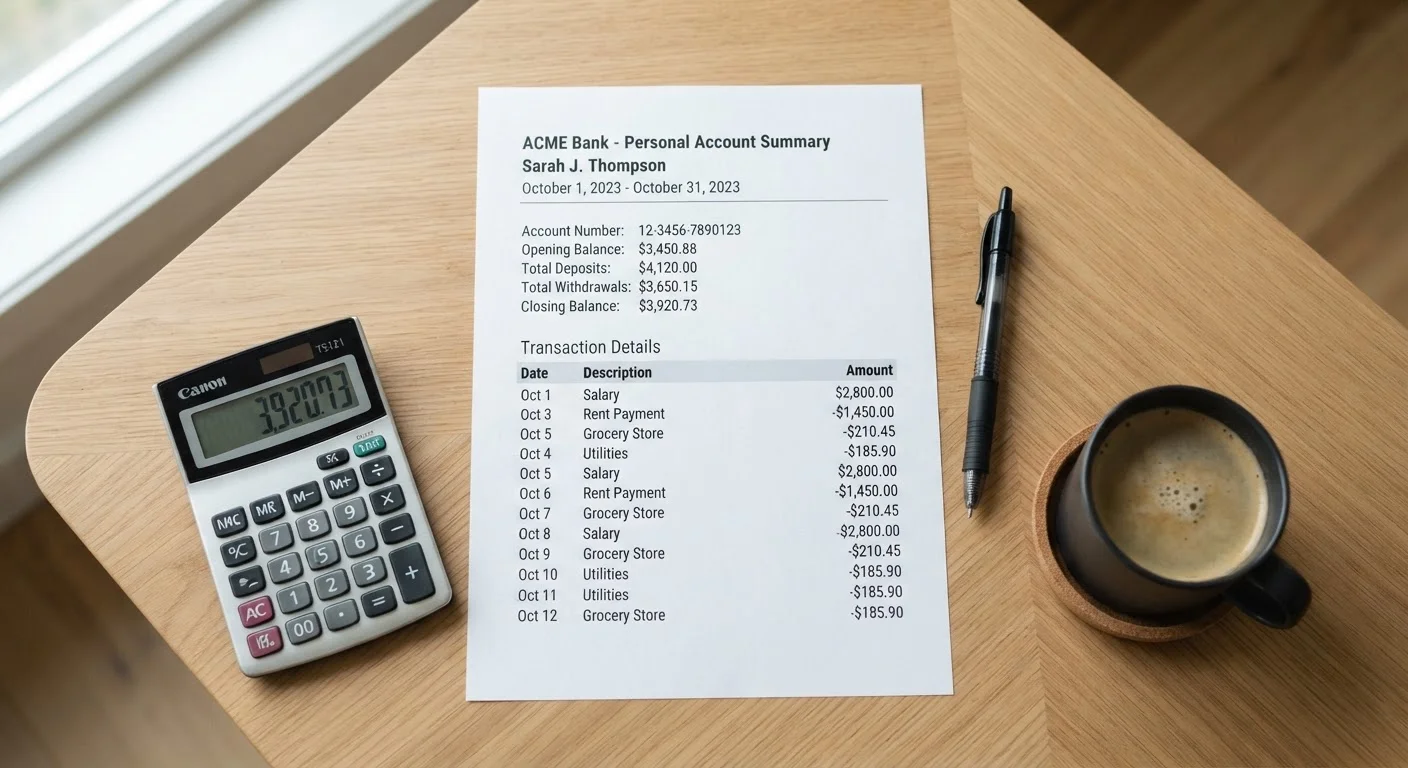
Every statement opens with a summary block. Confirm the opening balance (what was in the account at the start of the period) and the closing balance (what remained at the end). Then check total deposits and total withdrawals listed. These four numbers should tell a coherent story: opening balance + deposits − withdrawals = closing balance. If the math doesn't work, dig deeper.
Scan for Fees and Service Charges
Banks are required to itemize fees on your statement. Look for line items labeled monthly maintenance fee, overdraft fee, out-of-network ATM fee, or paper statement fee. These charges are often small individually but compound quickly. Note every fee and consider whether it was avoidable. Our guide to avoidable bank fees explains which common charges can often be waived or eliminated.
Review Each Transaction Line by Line
Work through the transaction register systematically. Each line should show a date, a description (merchant name or transfer label), and an amount. Cross-reference unfamiliar descriptions against your receipts or purchase history — some merchant names on statements differ from the storefront name. Flag any transaction you cannot explain, no matter how small. Fraudsters often test accounts with very small charges before escalating.
Identify Recurring Charges You May Have Forgotten
Subscriptions and automatic renewals are among the most common sources of unintended spending. Search your statement for repeated charges from the same merchant each month, or for annual charges appearing for the first time. Compare this list against services you actively use. Canceling forgotten subscriptions is one of the quickest wins in building a leaner personal budget.
Dispute Any Errors Promptly
If you identify an unauthorized charge or a bank error, contact your financial institution immediately. Most banks offer a dispute process through their app, website, or customer service line. Document the charge details — date, amount, merchant — and note the date you reported it. Keep records of all correspondence. Timely reporting is legally significant, so don't delay once you spot a problem.
Don't Confuse Pending and Posted Balances
Your available balance reflects pending transactions that haven't fully cleared yet, while your ledger balance shows only settled transactions. Spending against your available balance without accounting for pending items can result in overdrafts and associated fees. Always check both figures before making a large purchase.
The content on this site is for informational purposes only and is not a substitute for professional advice. Always consult a qualified professional for guidance specific to your situation.